Qyra YAML
Use Qyra without a dbt project by defining your semantic layer directly in YAML files
What is Qyra YAML?
Qyra YAML allows you to use Qyra without an existing dbt project. Instead of defining your semantic layer within dbt model YAML files, you define it directly in standalone YAML files that point to tables in your data warehouse.
This approach lets you leverage Qyra's powerful features without needing to adopt dbt first.
Why use Qyra YAML?
Qyra has always operated with dbt at its core. Traditionally, customers have active dbt projects, and Qyra builds its semantic layer within that dbt context.
However, not every team uses dbt. If you're interested in Qyra features like:
- AI agents that can answer questions about your data
- A semantic layer with consistent metric definitions
- Self-service analytics for your business users
...but you don't have dbt set up, Qyra YAML provides a path forward. You can define your semantic layer directly and start using Qyra immediately, without the overhead of adopting dbt.
dbt vs Qyra YAML: which should you use?
| Scenario | Recommendation |
|---|---|
| You already have a dbt project | Use the standard dbt integration |
| You're planning to adopt dbt soon | Consider setting up dbt first, then connecting to Qyra |
| You don't use dbt and want to try Qyra quickly | Use Qyra YAML |
| You want AI agents or semantic layer features without dbt | Use Qyra YAML |
| You have tables in your warehouse ready to explore | Use Qyra YAML |
The good news: if you start with Qyra YAML and later decide to adopt dbt, the YAML formats are compatible, so migration is straightforward.
Recommended: build with an AI coding agent
The fastest way to get started with Qyra YAML is to let an AI coding agent (Claude Code, Cursor, etc.) do the heavy lifting for you.
Follow the CLI installation guide and authenticate with Qyra.
Run qyra install-skills to teach your coding agent everything it needs to know about building in Qyra, from writing YAML models to creating metrics and deploying.
qyra install-skillsPrompt your coding agent to:
- Create your
qyra.config.ymland YAML model files based on tables in your warehouse - Generate dimensions and metrics for those models
- Deploy your project to Qyra with
qyra deploy --create --no-warehouse-credentials
Example prompt:
/developing-in-qyra Profile my warehouse, create Qyra YAML
models for the users and orders tables with sensible metrics and
dimensions, then deploy the project to Qyra.
Prefer to set things up manually? Follow the step-by-step guide below.
Getting started with Qyra YAML
Prerequisites
Before you begin, make sure you have:
- The Qyra CLI installed
- Authenticated with Qyra
- Credentials for your data warehouse (e.g., Snowflake)
- Tables in your warehouse that you want to explore
Step 1: Create your project configuration
At the root of your project, create a qyra.config.yml file to specify your warehouse type:
warehouse:
  type: snowflake
Replace snowflake with your warehouse type (e.g., bigquery, databricks, redshift, postgres, trino).
Step 2: Create your first model
Qyra YAML uses the same syntax as the Qyra semantic layer in dbt, but instead of nesting everything under meta tags, all configuration is at the top level of the file.
Create a directory structure for your Qyra project:
mkdir -p qyra/modelsCreate a YAML file for your first model. For example, ./qyra/models/users.yml:
# Metadata
type: model
name: users

# Table definition
sql_from: 'DB.SCHEMA.USERS'

# Metric definitions
# For more configuration see: /semantic-layer/metrics
metrics:
  user_count:
    type: count_distinct
    sql: ${TABLE}.USER_ID
    description: Total unique users

# Dimension definitions
# For more configuration see: /semantic-layer/dimensions
dimensions:
  - name: subscription_type
    sql: ${TABLE}.SUBSCRIPTION
    type: string

  - name: signed_up_at
    sql: ${TABLE}.SIGNED_UP
    type: date
    time_intervals:
      - DAY
      - WEEK
- MONTHUpdate the configuration:
- Set
sql_fromto the fully qualified name of your table (e.g.,DATABASE.SCHEMA.TABLE) - Update the dimensions to match the columns in your table
- Add metrics that make sense for your data
Step 3: Validate your YAML
Run qyra lint to check your YAML files for errors before you deploy:
qyra lintStep 4: Deploy your project
Create your Qyra project by deploying with the CLI — see qyra deploy for the full command reference:
qyra deploy --create --no-warehouse-credentialsThe --no-warehouse-credentials flag tells Qyra that you're deploying without warehouse credentials embedded in the CLI. After deploying, you'll need to configure your warehouse connection in the Qyra UI:
- Go to Settings (gear icon in the top right)
- Under Current project, click Connection settings
- Configure your Warehouse connection with your database credentials
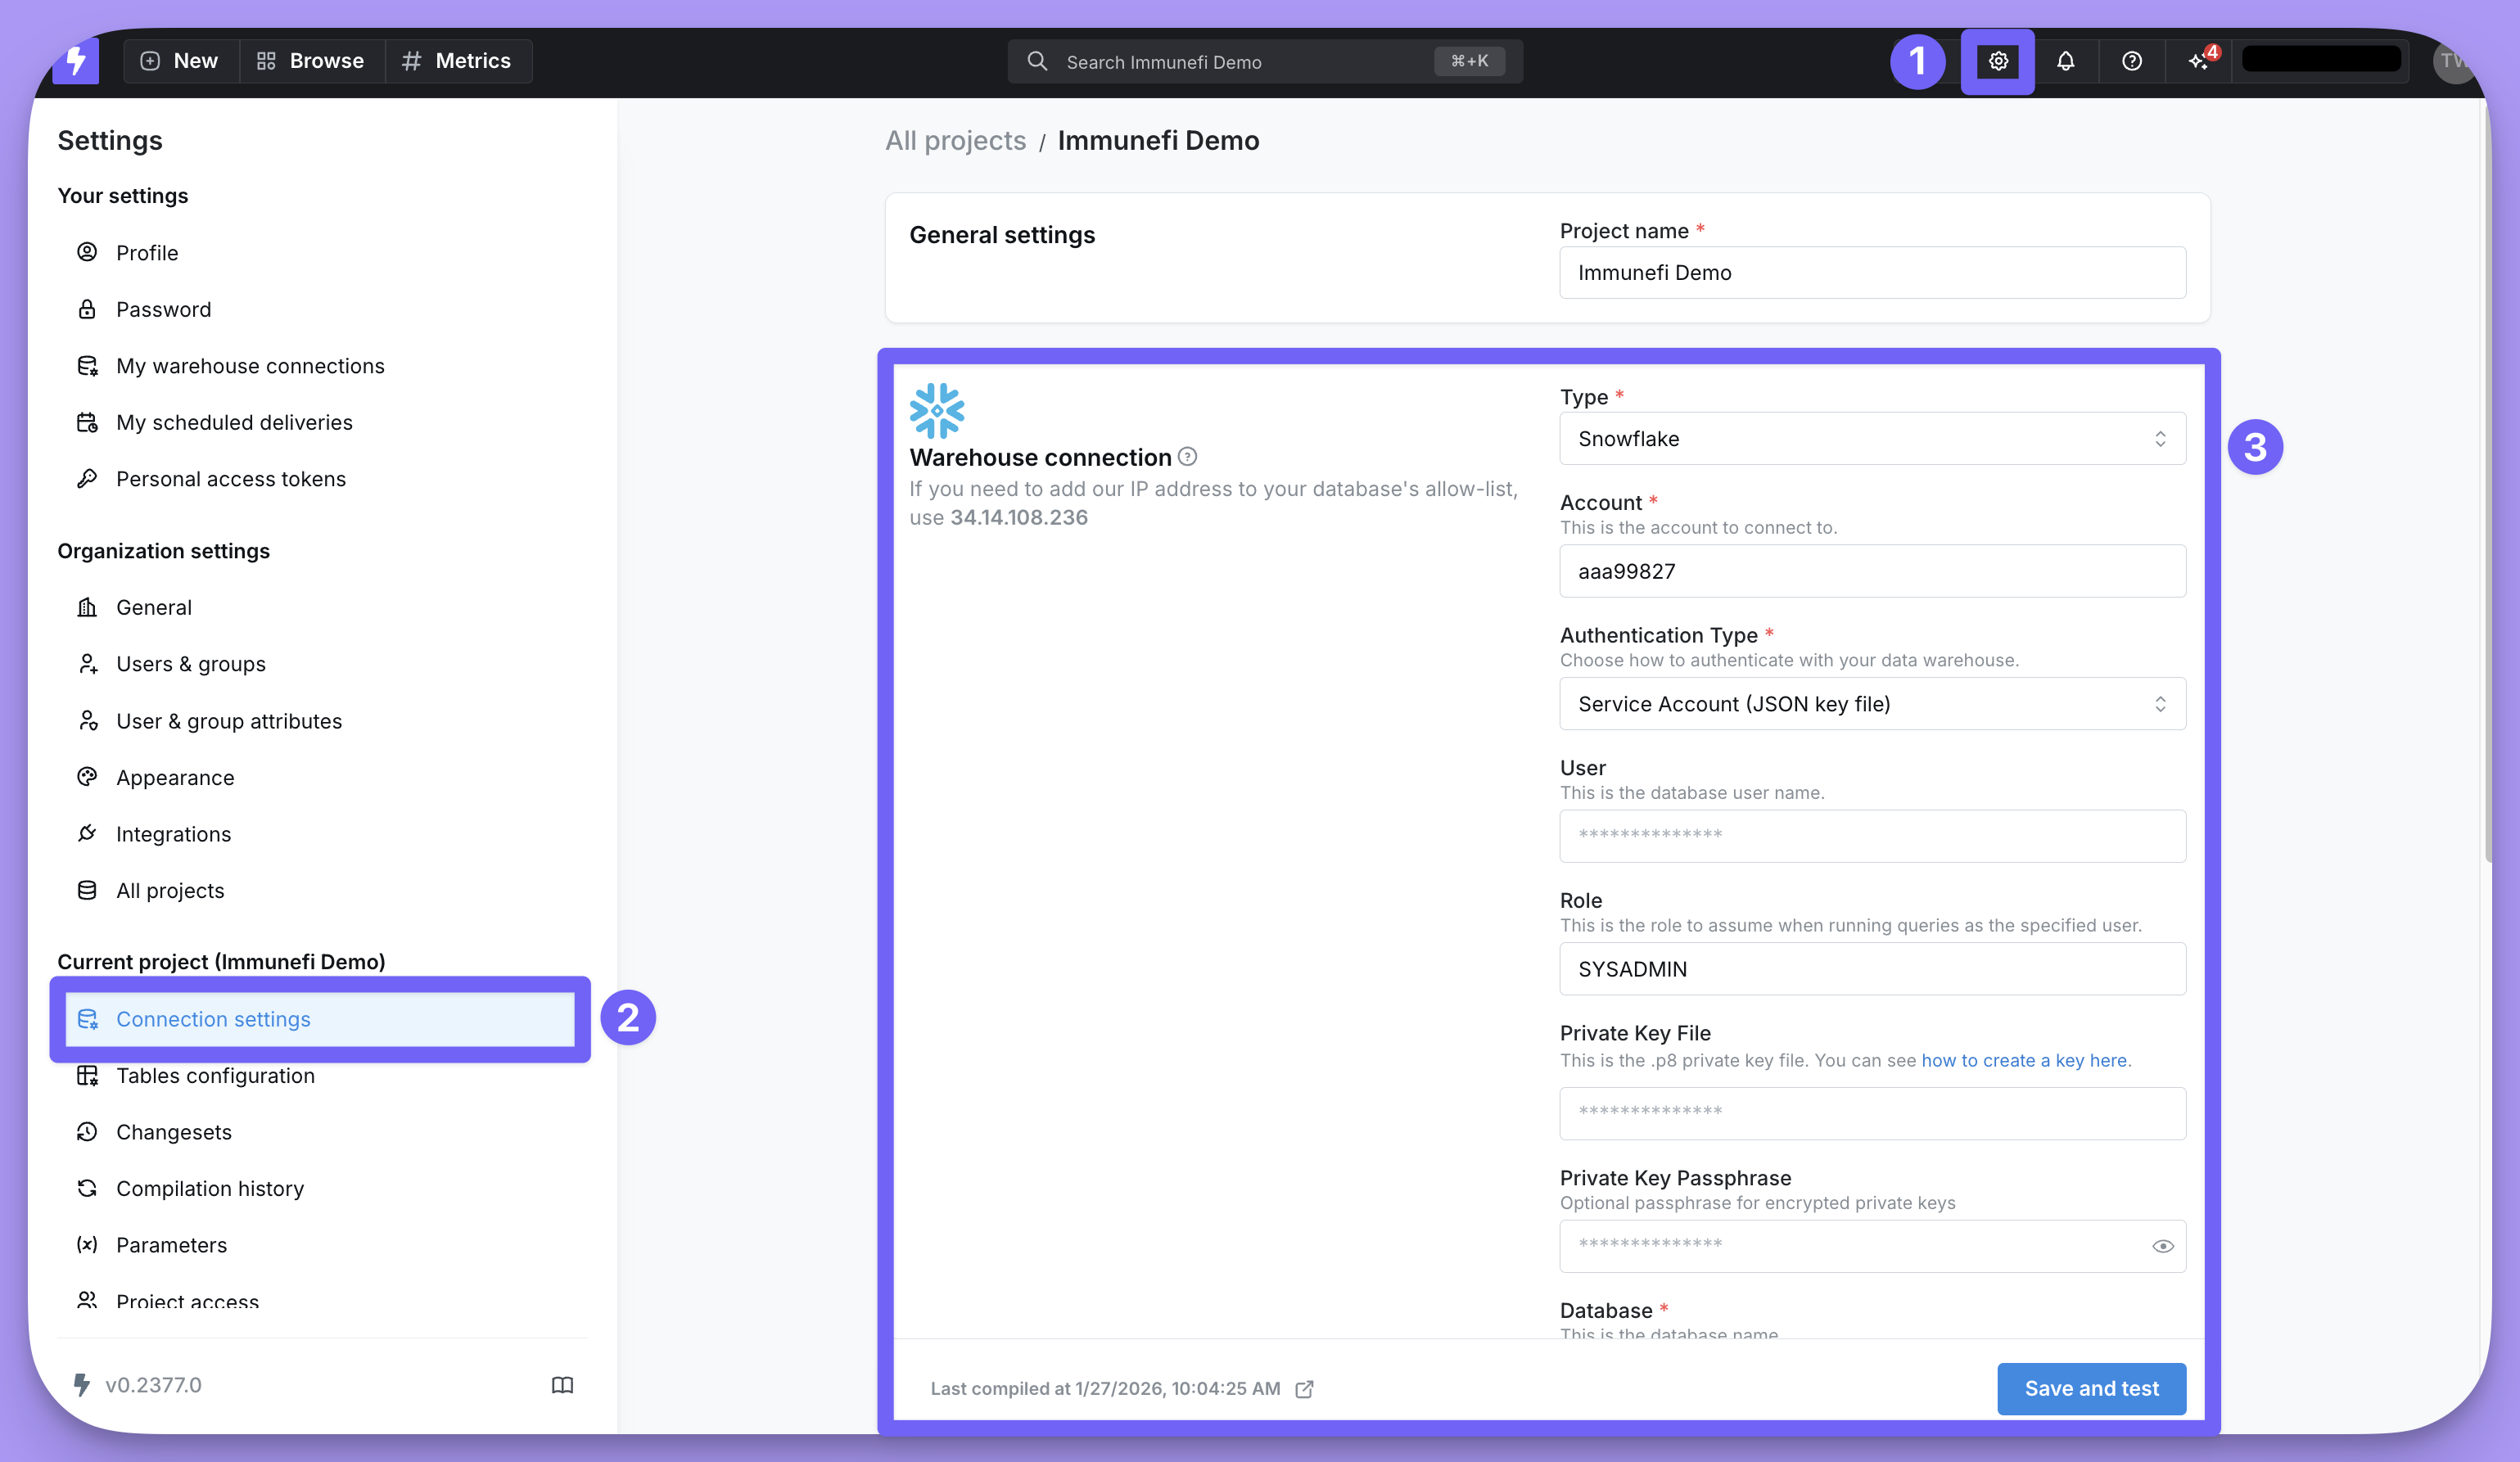
For detailed instructions on configuring your warehouse connection, see Connect to a warehouse.
Step 5: Update your project
After your initial deployment, you can edit your .yml files and redeploy changes:
qyra deploy --no-warehouse-credentialsDeveloping with AI coding agents
If you're developing with Cursor, Claude Code, or another AI coding agent, you can speed up your workflow significantly.
Recommended setup
-
Install Qyra skills: Run
qyra install-skillsto give your coding agent everything it needs to build YAML models, create metrics, and deploy to Qyra. Then ask your agent to create your YAML files, add some metrics, and deploy to Qyra.qyra install-skills -
Share your warehouse schema: Give your coding agent access to your warehouse schema so it can generate YAML files that match your actual table structures.
-
Use validation: Prompt your coding agent to always run
qyra lintafter making any changes to catch errors early.
With access to your warehouse schema, AI coding agents can auto-generate dimension and metric definitions for entire tables in seconds.
If you'd rather not install the skills, you can still point your coding agent at the Qyra YAML format specification directly.
Next steps
Once you've deployed your Qyra YAML project:
- Explore your data in the Qyra UI
- Create metrics to define your key business calculations
- Set up AI agents to enable natural language queries
- Learn about the semantic layer reference for advanced configuration options